Class Sites>Photo Fun>
Adobe Photoshop Elements Tutorials
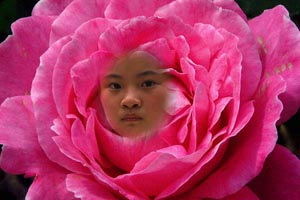
#3-Making a flower face.

Skills: Review of vignette, copying and pasting, use of layers.
Make the Vignette
- Open the photo you want to take the face from.¨On the menu bar File<click>, Open <click>, choose the photo file<click> Open<click>
- Use the Elliptical Marquee tool to select the area of the face you want for the flower center. ¨On the Tool box, Marquee tool <click>, on the options bar, choose the elliptical marquee tool, set the Feather option to 20 pixels.
- Click and drag the tool to select the area of the face . To adjust the position of the Oval, click and drag the oval with the mouse.
To make the vignette, on the Effects pallete ¨ Effects tab in the palette well. Double click on the Vignette effect.
Copy the Vignette to the Flower
- Open the flower image you want to paste the face onto. ¨On the menu bar, File <click>, Open File<click>, choose the photo file<click> Open<click>
- Copy the selection¨On the Tool Bar, click on the Move Tool, click on the vignette, hold the ALT key down on the keyboard and click and drag the vignette over to the flower.
- Position the face over the center of the flower. ¨On the Tool Box, Move Tool <click>, click and drag the face to the position you want.
- Save the picture as a jpeg when you are finished working on it.
Direction to print multiple copies:
1. Printing multiple wallet sized prints: On the Menu Bar, click on File, Print Layouts <click>, Picture Packages <click>. Under layout choose the picture package you would like to print. (9) 2.5 X 3.25, Click the OK button.
2. The photo package is actually another image by itself. If you plan to print this package again save the image package.
To print the image package, on the menu bar, File <click>, Print <click>, OK<click>.
Next>>>Working with Layers
| My Portfolio | Choosing a Web Designer | Marketing Your Web Site | Pricing | Contact Me |